Hiking is a fantastic way to connect with nature, challenge yourself physically, and rejuvenate your spirit. However, knee pain can often become a deterrent for avid hikers, limiting their ability to explore the great outdoors. If you're someone who loves hiking but struggles with knee pain, a kinesiologist might hold the key to unlocking your hiking potential once again.
In this blog post, we'll explore how the principles of kinesiology can help alleviate knee pain and provide you with strategies to enjoy hiking iconic Vancouver, BC hikes such as the Grouse Grind, the Stwamus Chief, Garibaldi Lake and the Howe Sound Crest Trail to their fullest.

Understanding the Anatomy of the Knee
The knee joint is a complex structure composed of bones, ligaments, tendons, and cartilage. It is the largest joint in the body, responsible for supporting body weight and facilitating movements such as walking, running, and climbing. Several muscles play essential roles in knee movement and stability, including:
- Quadriceps: The quadriceps muscles, located at the front of the thigh, are responsible for extending the knee joint.
- Hamstrings: The hamstrings, located at the back of the thigh, assist in knee flexion and provide stability during hiking.
- Hip Abductors: The hip abductor muscles, including the gluteus medius and minimus, stabilize the pelvis and prevent excessive inward collapse of the knee during walking or hiking on uneven terrain.
Understanding Knee Pain from Hiking
Knee pain is a common complaint among hikers, often resulting from overuse, improper biomechanics, or underlying conditions such as arthritis or ligament damage. It can manifest as discomfort, stiffness, swelling, or even sharp pain during or after hiking.
Ignoring knee pain can exacerbate the issue and lead to long-term complications. This is where a kinesiologist can play a crucial role completing an assessment to understand the root of the problem.
Common Causes of Knee Pain
Several factors can contribute to knee pain while hiking. Some of the common causes include:
- Overuse: Repeated stress on the knee joint from extended periods of hiking, especially on uneven terrain, can lead to pain and discomfort.
- Muscle Imbalances: Weakness or imbalances in the muscles surrounding the knee, such as the quadriceps, hamstrings, and glutes, can put extra strain on the joint and lead to pain.
- Poor Biomechanics: Incorrect body mechanics, such as improper hiking posture or foot placement, can result in excessive stress on the knee joint.
- Previous Injuries: Old knee injuries, such as sprains or strains, can contribute to chronic pain and instability during hiking.
The Role of Kinesiology in Managing Knee Pain
Kinesiology focuses on understanding how the body moves and functions, encompassing principles of anatomy, biomechanics, physiology, and exercise science. By applying kinesiological principles to hiking, you can identify the root causes of your knee pain and develop a comprehensive strategy to manage and prevent it. Here's how a kinesiologist can help:
- Biomechanical Analysis: A kinesiologist can analyze your movement patterns, assessing your gait, stride, and alignment. By identifying any biomechanical issues, such as overpronation or poor knee tracking, they can recommend corrective exercises, stretches, or modifications to your hiking technique.
- Strengthening Exercises: Weakness in the muscles surrounding the knee, particularly the quadriceps, hamstrings, and glutes, can contribute to knee pain. A kinesiologist can design a targeted strength training program to address muscle imbalances and enhance the stability of your knee joint.
Examples of exercises to strengthen the knee
- Step-Ups: Find a step or low platform. Step up with one leg, driving through your heel, and lift your body up. Slowly lower yourself back down and repeat on the other leg. Aim for 10-12 reps on each leg.
- Glute Bridges: Lie on your back with your knees bent and feet flat on the ground. Lift your hips off the ground while squeezing your glutes. Hold for a few seconds and then lower your hips back down. Perform 10-12 repetitions.
- Clamshells: Lie on your side with your knees bent and your feet together. Keeping your feet together, lift the top knee as far as you can without rotating your hips. Slowly lower the knee back down. Aim for 10-12 reps on each side.
- Single-Leg Deadlifts: Stand with your feet hip-width apart. Shift your weight onto one leg and hinge forward at the hips while extending the opposite leg behind you. Reach towards the ground while keeping your back straight. Return to the starting position and repeat on the other leg. Perform 10-12 repetitions on each leg.
- Wall Squats: Stand with your back against a wall and your feet hip-width apart. Slowly slide down the wall into a squat position, keeping your knees aligned with your toes. Hold for a few seconds and then push through your heels to return to the starting position. Aim for 10-12 reps.
- Flexibility and Mobility Training: Limited flexibility in the hip, ankle, or surrounding muscles can place excessive strain on the knees while hiking. Through stretching exercises and mobility drills, a kinesiologist can help improve your range of motion, reducing stress on the knee joint.
Some examples of flexibility and mobility training include
- Quadriceps Stretch: Stand near a wall or hold onto a sturdy object for balance. Bend one knee and reach back to grab your ankle or foot with your hand. Gently pull your heel towards your glutes until you feel a stretch in the front of your thigh. Hold for 30 seconds and repeat on the other leg. Perform 2-3 sets on each side.
- Hamstring Stretch: Sit on the ground with one leg extended in front of you and the other leg bent. Reach forward towards your extended leg, reaching for your toes or ankle. Keep your back straight and avoid rounding your spine. Hold for 30 seconds and repeat on the other leg. Perform 2-3 sets on each side.
- Calf Stretch: Stand facing a wall or tree. Place your hands against the wall at shoulder height. Take a step back with one leg and keep it straight with your heel on the ground. Bend your front leg and lean forward, feeling the stretch in your calf muscle. Hold for 30 seconds and repeat on the other leg. Perform 2-3 sets on each side.
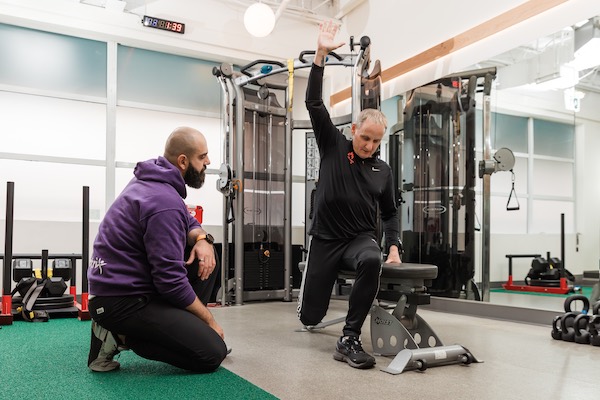
- Hip Flexor Stretch: Kneel on one knee with your other foot positioned in front of you. Shift your weight forward onto your front foot, keeping your back straight. You should feel a stretch in the front of your hip and thigh. Hold for 30 seconds and repeat on the other leg. Perform 2-3 sets on each side.
- Injury Prevention Strategies: Kinesiology emphasizes the prevention of injuries through proper warm-up routines, dynamic stretching, and exercise modifications. By adopting these strategies, you can reduce the risk of knee pain during your hiking adventures.
- Load Management: Kinesiologists can assist you in understanding the impact of load on your knees. They can help you establish a gradual progression plan for your hikes, ensuring that you don't overload your knees too quickly. By gradually building strength and endurance, you can minimize the risk of knee pain while enjoying the trails.
- Postural Alignment: Correct posture is crucial for optimal movement and reducing stress on the knee joint. A kinesiologist can assess your posture and provide guidance on maintaining proper alignment during hiking, thus minimizing unnecessary strain on your knees.
Conclusion
Knee pain should not keep you from pursuing your passion for hiking. Through the principles of kinesiology, you can address the underlying causes of knee pain, improve your biomechanics, and develop a customized plan to manage and prevent discomfort while hiking.
By working with a kinesiologist, you can strengthen your muscles, enhance flexibility, and optimize your movement patterns, ultimately enabling you to hit the trails with confidence and enjoy the beauty of nature without limitations. So, lace up your hiking boots, and get ready to explore the breathtaking trails of Vancouver without the hindrance of knee pain.
Your adventure awaits!